In my previous post entitled “Maperitive: My first map render”, I introduced the concept of creating your own map style using the offline tool, “Maperitive”. At the time we looked at a very simple example of downloading a geographical region of OpenStreetMap data, loading it into Maperitive and drawing (rendering) your own map using the built in rendering rules.
In this follow up post we will explore the idea of creating your own basic rendering rules in order to highlight specific map features. As coincidence will have it, at Mappa Mercia’s last monthly meet-up we spoke about rebooting the main mappa-mercia.org website no that our original maintainer is no longer living in the UK. I will therefore look at the gritting map as an example.
Step 1. Downloading the data
Before we can get started on writing the rendering rules we must first download the required OpenStreetMap data and understand the tags – after all it is the tags that drive the rendering rules!
To do this we are going to use the Overpass XAPI. This enables us to download a subset of data based on a specified tag and geographical region (defined by a rectangular “bounding box”). In this example we will download all ways with the tag “maintenance=gritting” that fall within a sample are of Birmingham. Copy and paste the following web address into your browsers URL box and save the resulting file as “gritting.osm”:
http://www.overpass-api.de/api/xapi?way[bbox=-1.93,52.4,-1.79,52.5][maintenance=gritting][@meta]
As you can see, the web address used to download the required data is easy to understand and adapt to other uses. The geographical region is specified by “[bbox=-1.93,…] ” and the download is restricted to only ways with the tag “[maintenance=gritting]”. Finally [@meta] is used to download the additional metadata required to open the file in JOSM.
For more examples, see the wiki entry for Overpass XAPI. Other ways to download OpenStreetMap data can be found here.
Step 2. Examining the data
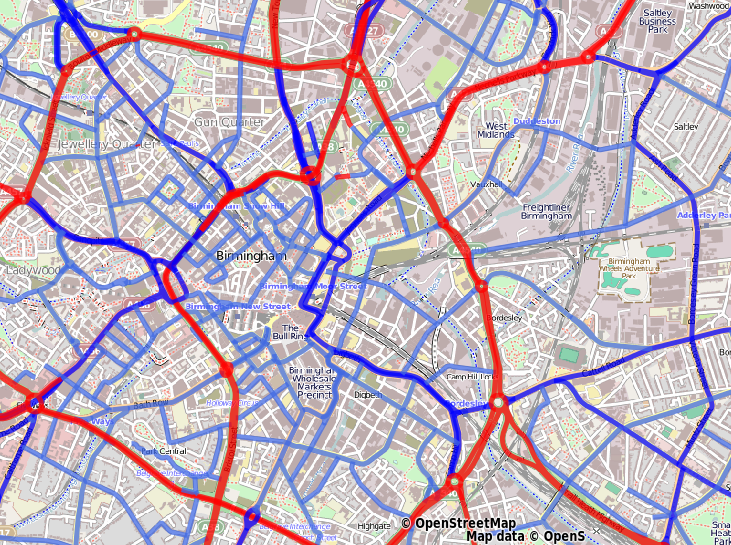
If we open the resulting “gritting.osm” file in JOSM (or if you already know the data well enough), we find that all gritting routes are tagged with a priority from 1 to 3. For example, “gritting=priority_1”. We will therefore set up our rendering rules in order to create map showing these as colour coded routes.
Step 3. Writing the rendering rules
Maperitive rendering rules specify what gets drawn on the map and how it gets drawn. You start writing rules by specifying “features”. A feature could be a forest, a motorway, a bench. This answers the “what?” part. After that, you specify the actual “rules” for these features. This answers the “how?” part.
Rules are specified in a simple text file and can be edited with a text editor. Within the “Rules” folder of your Maperitive installation, create a text file called “gritting.mrules” (note that in Windows you may have to change a setting so that file extensions are visible) and copy the following text into the file:
features
    lines
        gritted route : maintenance=gritting

rules
    target: gritted route
        define
            line-opacity : 0.75
            min-zoom : 5
            line-width : 5
        for : gritting=priority_2
            define
                line-color : blue
        elsefor : gritting=priority_3
            define
                line-color : royalblue
        else
            define
                line-color : red
        draw : line
In the top section, we are defining that we wish to create a line feature called “gritted route” and that only ways tagged as “maintenance=gritting” belong to this group. In the lower section we define rendering rules for the feature. All gritted routes are drawn with the same line opacity, minimum zoom and line width, however we separate out line colour according to the priority tag. In my test, it would appear that any HTML colour name is allowed (?). For more on rendering rules, see the Maperitive guide.
Step 4. Create your map
We’ve downloaded the OpenStreetMap data and written some basic rendering rules. All that remains is to generate our map. Open Maperitive and load the “gritting.osm” file using File->Open Map Sources…. The final step is to tell Maperitive which rendering rules to use. To do this enter the following two lines (one at a time) in Maperitive’s Command Prompt:
use-ruleset location=Rules/gritting.mrules
apply-ruleset
Finally we can export the map as a PNG image by using Tools->Export To Bitmap. The location in which the image file was saved is shown at the bottom left, as the final line in the Commander