Overstock Deal Rhino 3d Training Holiday Cheer Edition [OWiEBbgj]
OverviewReady to boost your income while enjoying the freedom to work from anywhere? The "3D Designer in 45 Days" course is your gateway to a high-demand field where you can earn significantly more as you grow. Tailored for those who crave both creat
Secure Shopping
100% Safe Guarantee
Free Shipping
On orders over $30
Money-Back
30-Day Guarantee
Overstock Deal Rhino 3d Training Holiday Cheer Edition [OWiEBbgj]
Overview
|
Ready to boost your income while enjoying the freedom to work from anywhere? The "3D Designer in 45 Days" course is your gateway to a high-demand field where you can earn significantly more as you grow. Tailored for those who crave both creative expression and career flexibility, this course provides the essential skills and knowledge you need to succeed. Guided by experienced mentors every step of the way, you’ll learn to take on exciting projects and build a rewarding career that fits your lifestyle. We’ve distilled years of 3D technology expertise into a comprehensive, accessible course that empowers you to design your future on your own terms.
|
 |
|
|
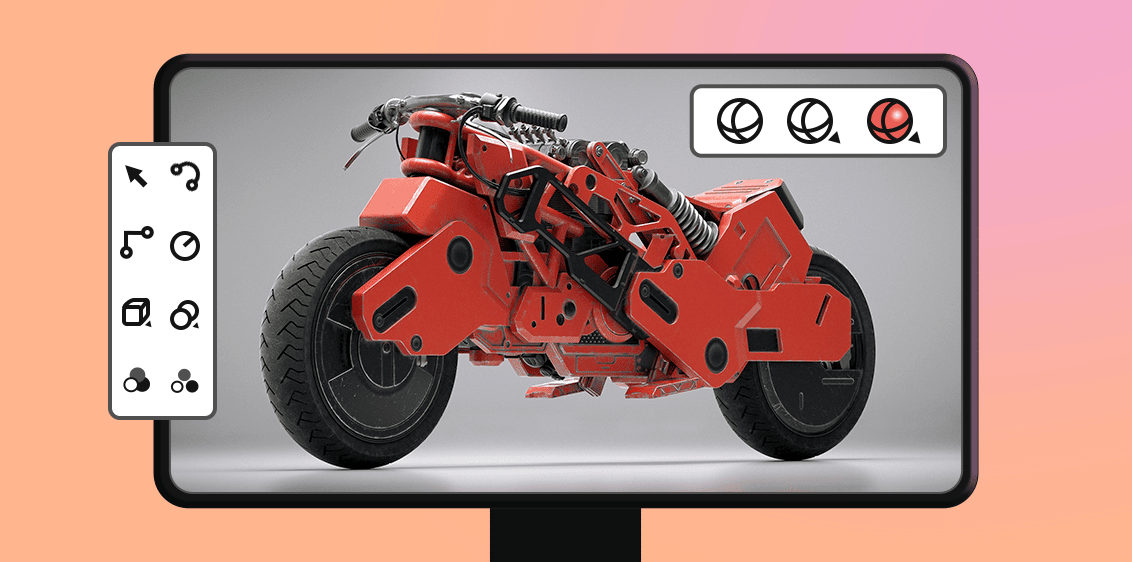
Course Program:
|
 |
Course Author:
 |
Author of comprehensive 3D modeling courses specializing in interior design, industrial design, footwear design, and jewelry design. With 14+ years of professional experience using Rhinoceros, including 9 years of teaching and mentoring students. |
Frequently Asked Questions:
- Do I need prior knowledge of 3D modeling to take the course? No, the course is designed for beginners and does not require prior experience in 3D modeling.
- What software will we use during the course? We use Rhinoceros 3D to provide the best learning experience. A free trial version is sufficient.
- How many hours per week should I dedicate to studying? We recommend dedicating about 2 hours a day to complete the course in 45 days. However, you can adjust your schedule according to your needs and responsibilities.
- Can I study if I have a Mac computer? Yes, Mac users do not have any problems taking this course despite slight differences in the interface.
- How do I get support from mentors? You can ask any questions related to the course and practical tasks in the community chat for 90 days from the date of course purchase.
- Can I suspend the course if anything happens? Yes, you can pause your studies and continue later.
- What types of tasks are included in the course? The course includes basic practical tasks. To receive a certificate, only basic tasks need to be completed.
- Will I receive a certificate after completing the course? Yes, after completing all the basic tasks, you will receive an official certificate.
- Will the course materials be available after it ends? The course materials will be available forever from the date of course purchase.
- Can I get a refund if the course does not suit me? Yes, we offer a money-back guarantee within the first 3 days after the course starts.
- Is the course online or offline? The entire course is online, allowing you to study from anywhere at a convenient time for you.
- Can I communicate with other course participants? Yes, you will have the opportunity to communicate with other participants through the course community in Telegram.
- Is there a trial period for the course? We do not offer a trial period, but you can take advantage of the money-back guarantee within the first 3 days after the course starts.
- Will I have access to course updates after it ends? Yes, you will have access to all updates and new course materials even after it ends.
- How to access the course? After purchasing, you will be given access to the course on the Google Classroom platform within 1 hour.
Course Summary
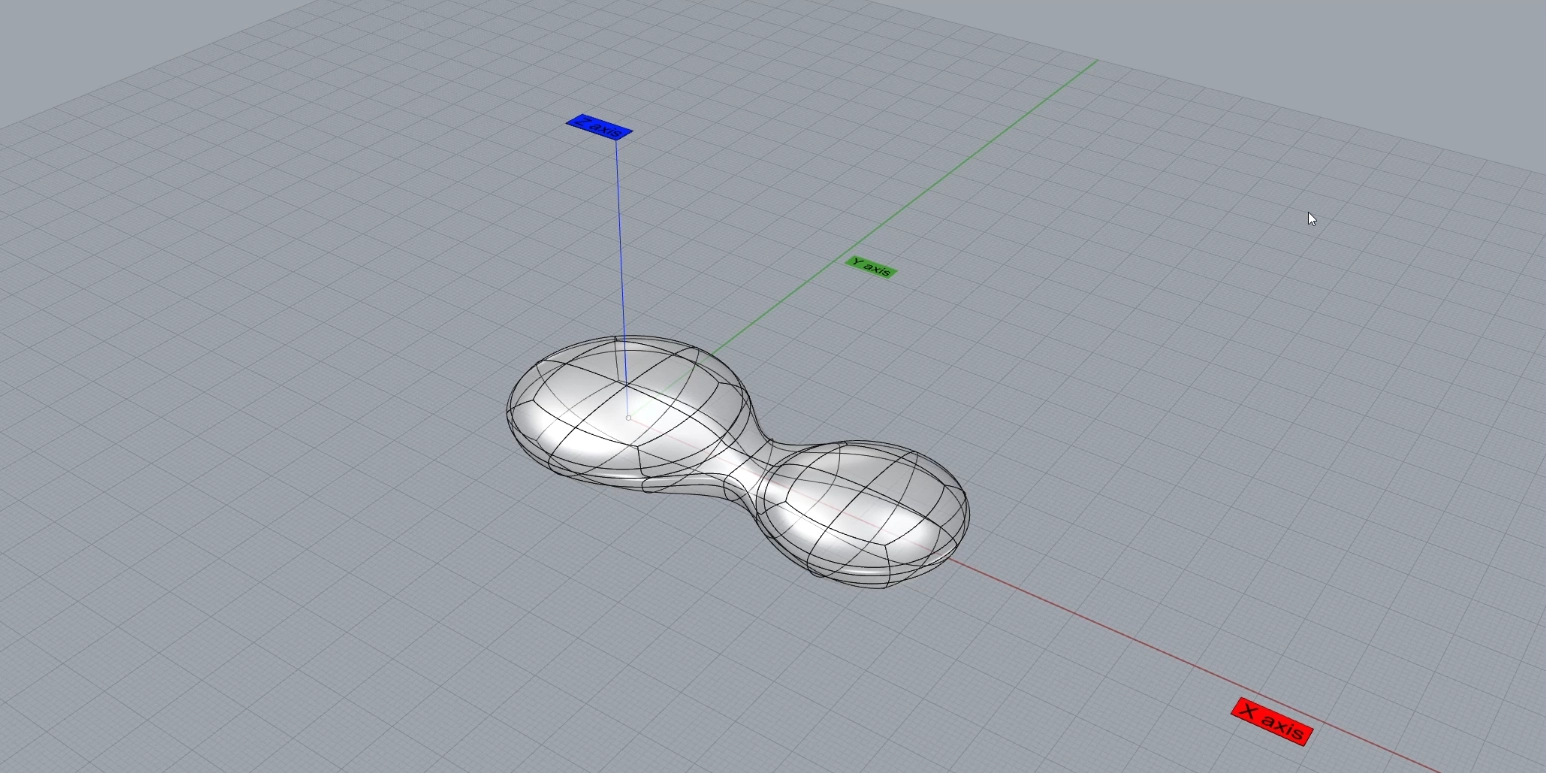
1. NURBS Curves
In this module, you will learn how to use NURBS curve tools. Curves are the foundation of
surface modeling. We will create two logos and get acquainted with tools for creating closed
curves. Then, we will use the curves to construct a solid by extruding the closed areas. At
the end of this topic, you’ll find interesting exercises to enhance your understanding of
curves as the basis for surfaces.
2. NURBS Surfaces
This module covers the basic tools for creating surfaces. We will divide this material into two
groups: NURBS surfaces and SubD – a new set of tools for creating organic, amorphous 3D
objects. Surface creation tools – five commands that give you freedom in modeling. After
creating surfaces, you need to join them using blending and analysis tools like Zebra.
By watching the videos in this module, you will reach a new level of mastery in the program.
Introduction to SubD tools continues in the next lesson.
The exercise might surprise you with examples of applying parametric Grasshopper
algorithms and teach you to use UV unfolding for transferring textures from a plane to a
curved surface.
3. SubD Surfaces
In this module, you will get acquainted with the new logic of construction – SubD surfaces. It
differs from NURBS and is closer to polygonal modeling. You will see and try how SubD
works. Model elements are selected using filters: points, edges, surfaces. By editing basic
shapes, you will create a finished form in several stages, and at each stage, you can modify
it using selection filters and floating points or edges.
Additionally, these tools will teach you to use the manipulator and help develop spatial
perception of objects. After watching all the videos in this topic, you will become a 3D
designer proficient in two different construction technologies – classic surface modeling and
SubD with polygonal modeling principles, similar to Blender or 3Ds Max.
The exercises will add practice in mastering SubD techniques, and in the materials, you’ll
find a file with SubD tools in a table format for exercises.
4. NURBS Surfaces Editing
Try to perceive the finished 3D model as something dynamic and editable. NURBS surfaces
are just that. As long as they are enclosed in a polysurface, they cannot be edited. Once we
split the polysurface into separate segments, we gain the ability to change them. This
module will teach you to edit surfaces using control points. Interaction with surface control
points is an advanced editing method comparable to sculpting.
Your most complex models will require this editing method in some way. By repeating the
exercises in this module, you practice applying this method. Additionally, we will master
visualization practice. You will also learn to analyze and filter surface sets using
Grasshopper.
The exercises in this topic include repetitions and solutions to problems related to surface
editing, UV unfolding, and the parametric Grasshopper module.
5. Object Transformation
At this stage, we will get acquainted with transformation tools. We arrange elements on a
wheel to create a texture, using various methods of transferring from plane to surface and
subtracting elements. In the next example, we arrange a matrix of elements along a curve
and along a curve on a surface. During curve editing, elements also change, which is done
by working with history.
In the follow-up task to topic 5 – building a twisted object in a spiral. The twisted object
(Twist) is used in blacksmithing to obtain intricate patterns. We will consider how to create a
smooth twisted object and move it along a curved line using the Twist, FlowOnSurface, and
FlowOnCurve tools.
After that, we analyze the length of both curves. An additional task discusses the command
for stretching an object on a surface with the possibility of repeating the object, illustrated
with a Japanese ornament example.
6. Visualization
Modeling a finished product from scratch awaits you in the last module. The final result – a
pendant in the shape of a key with Roman numerals. The essence of this topic is a project
with the instructor. From start to finish, we practice tools for creating curves, elongated
objects, and various surface creation tools, combining surfaces into polysurfaces.
We control the quality of edges and their closure, paying attention to preparing the object for
3D printing. The object can be printed on a 3D printer, cast from various metals, or used to
create a casting system considering shrinkage for mass production. This means the model is
linked to production and has practical applications.
In the task, we design Roman columns. We refine skills in creating curves, surfaces, and
placing small objects along curves. We model a sectional wall using skills in history, parent
and child objects, and control points. We will create the wall using Grasshopper.
In an additional task, we add textures to a bracelet model (physics-based material), using
ready-made and custom materials for visualizing the object.
What Our Customers Say
Absolutely no complaints!
An outstanding tool. Very clever.
- Telor Q..
Absolutely no complaints!
It’s a very solid and reliable gadget.
- Tilda T..
Absolutely no complaints!
This is a very well-made, solid item.
- Ernestine B..


![Ancor NMEA 2000 Single Device Backbone Starter Kit [270203]](https://cdn.shopify.com/s/files/1/0007/2797/3935/products/80193XL.jpg?v=1568157589)

![Humminbird XHS-9-HDSI-180T TM Transducer [710201-1]](https://cdn.shopify.com/s/files/1/0635/6277/6767/files/31496XL.jpg?v=1733810459)


![Total Nevastane SH (32) [5.00-gal./18.93-Liter. Pail] 198365](https://cdn.shopify.com/s/files/1/0888/2395/5732/files/watermark-Idz32EAxdmxDTFJp0kfoTa8OI83fimLO2yA6PsEg_8beb6a3b-5c6a-4bac-a70a-64e7f5bef364.jpg?v=1748357370)


